


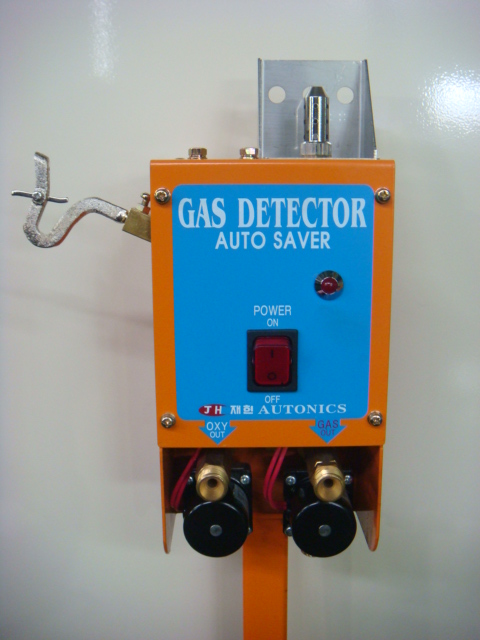
Gas Saver
GAS DETECTOR (AutoSaver)

1. Summary
Models Areas of use JH-GS0 LPG & LNG, Oxygen, Acetylene JH-GS1 NвӮӮ regulator ; The Prevention device of Oxidation JH-GS2 Flame Force Adjustable JH-GS3 Cutting and Heating (higher capacity)
The Auto Gas Saver incorporates electronically operated valves for the On/Off switching of
Gas/Oxgen or Air etc, also for the supply of gas to the Pilot Flame. And also, it is included
in torch hanger unit and electronic PC Boaed etc.
2. Model
3. Advantages
1) Safety
- If it's not ignired on the torch within defined time, gas feeding stops automatically by the solenoid valve.
- Gas feeding also stops automatically when the saver fall down due by carelessness or it's mechanically impacted.
- There is no backfire/backward due to serial processing by means micro process control.
2) Workability
- The way that special line is connected in the gas inflow is improved to flow-in at the 2 points(when using flux)
- Some inconvenient functions are not necessary anymore; for example, to put example, to put out by hanging the torch
after torch ignition or end of work in case of brazing repeatedly. To adjust the flame.
3) Economy
- This Pilot Flame will be Extinguished automatically in a few seconds just after the ignition is made successfully
Pilot Flame Consumes very little gas.
4) Endurance
- It's considerably increased the endurancs by using PCB micro process controller.
(Endurance test over 1,000,000times)
- Pilot nozzle is designed so optimized that the nozzle is not blocked by gas flux.
4. Specification
|
Mainsvoltage |
220V 50/60Hz |
|||||||||
|
Power consumption |
20W |
|||||||||
|
Control voltage |
DC24V and 220V |
|||||||||
|
Pressure range |
1.0Kgf/cm3(fuelgas), 7.0 Kgf/cm3 (Oxygen gas) |
|||||||||
|
Temperature range |
0~+50в„ғ |
|||||||||
|
Size |
120W X 120D X 230H(mm) |
|||||||||
|
Weigh |
3.8 KG |
|||||||||
5. Principle of Function
During brazing or soldering, it switches ON the internal micro switch by lifting up the torch from the torch holder.
This leads to the high frequency transformer and ignition solenoid valve open. At the same time, the arc ignites
at the pilot nozzle. It continued to spark for 2 – 3 seconds by the pilot flame and high pressure transformer for
ignition. Then it cuts out after ignition. If putting again the torch on the torch holder after working, the torch and
pilot flame are put out automatically.
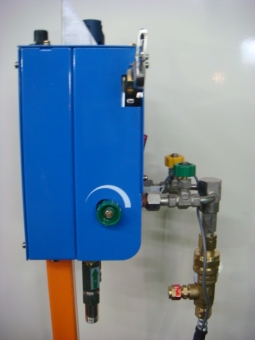
6. Installation Instruction
> Fix the saver on the stand (post) with the screws.
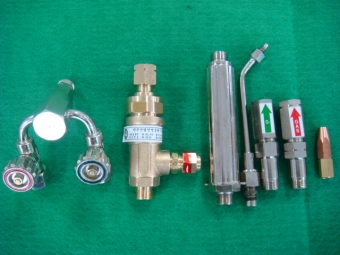
> Assemble the torch hanger on the torch holder.
> Connect the torch hose into the outlet for gas/oxygen of the saver.
(It’s not allowed to use the Teflon materials)
> Connect the saver into the inlet for gas/oxygen.
> Check if the gas/oxygen is leaked on each connection part using the soapy water.
> Check the gas supply pressure. (LPG - 0.5kg/cm2, O2 – 5kg/cm2)
> Connect the main plug in 220V.
> Turn the main switch on and check the main voltage lamp lit up on the front of saver.
> Fasten the needle valve of torch and adjust the pilot flame lifting up the torch.
> Ignite on the torch and adjust the torch flame.
> If putting the torch on the torch holder again after working, gas/oxygen supply will be cut out.
> Turn the main switch off and check the main voltage lamp out on the front of saver.
> Fasten the gas main valve.
> In case of using vapor flux, fasten also the valves in the inlet and outlet of vapor tank.
7. General Remarks for Installation and Operation
• It must be mounted the flashback protection in the gas inlet/outlet.
• The gas saver must be installed at the place being well ventilated.
• Handle the gas saver with care because of using electronic circuit.
(Any shock can damage the built-in pc-boards)
• Do not change at discretion on the circuit of gas saver without agreement with manufacturer.
(Otherwise it results in faults in function or flashback)
• Make sure that the gas cuts out after working by fastening the main valve.
• Perform the regular check for the leakage on the connection parts.
(Give a person in charge of duty and let him check once a week)
• Clean the pilot nozzle and torch regularly.
• Do not use at the place of high temperature and humidity.
(Otherwise the circuit can be broken as well as lifetime can be reduced)
8. Trouble shooting
> Check the main voltage lamp lit up on the front of gas saver.
> Check the main plug is in.
> Check the main fuse and change the fuse if necessary.
> Check pilot flame is ignited.
> If it does not spark, adjust the distance of igniter.
> If it’s not improved still despite of adjusting igniter distance, check the power supply of ignition transformer.
> Check it functions in normal the solenoid valves for LPG/Oxygen by turning it by hand.
> If necessary, change the valves.
> Check it functions in normal the solenoid valve for ignition.
> If the gas saver does not work by falling down or shaking seriously, turn the main switch off and on again.
After then, reset the auto saver switch.
> Contac After-Sales Service and ask the remedies.


